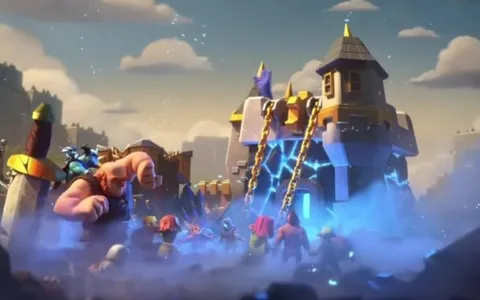
The third arena in Clash Royale, known as the Barbarian Bowl, presents new challenges to players.
Compared to the previous two arenas, which were more of introductory stages, Barbarian Bowl forces you to improve your strategy and decision-making.
To beat these levels, you must first assemble a competitive deck. Even then, don’t be surprised if you lose a few games with your lineup, as the game requires constant modifications.
Ideally, you should learn more about the best deck for Arena 3, so you don’t have to repeat the same battles over and over again.
To help you out, we’ve listed the best deck, designed to provide you with a massive boost.
The Arena 3 Landscape
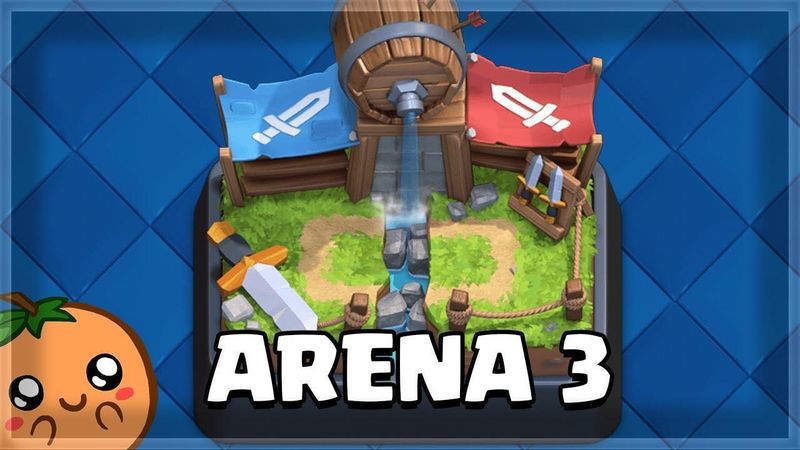
The Barbarian Bowl, unlocked at 600 trophies, introduces a new trio of cards that fundamentally changes the game:
Barbarians: A quartet of brawlers that can stop a Prince charge or form a devastating offensive wave. They are the gatekeepers of this arena.
Cannon: A cheap yet powerful defensive building. The cannon deters tanks like the Giant and Hog Rider away from your towers, offering incredible defensive value for a low elixir cost.
Rage: A spell that can turn a modest push into a tower-shattering onslaught.
If you want to create a winning deck, you must find the best way to address these threats. The direct counters are usually the best solution, but you must also consider building a deck with a high degree of synergy.
Giant Beatdown Deck

One of your best options is the classic Giant Beatdown strategy, refined for the specific challenges of Arena 3. It’s reliable, powerful, and helps you counter-push enemies. In fact, some of the tactics you’ll devise in this arena can be used in some of the end-game content!
Average Elixir Cost: 3.8
Giant: The main card in your deck, allowing you to fulfil the win condition.
Musketeer: The versatile range unit that engages both air and ground defenses.
Mini P.E.K.K.A: The high-damage assassin is ideal for quickly dispatching tanks and towers.
Bomber: Bombers provide you with splash damage, which is necessary when battling swarming troops.
Valkyrie: This unit is unmatched for clearing ground swarms like Skeleton Army and Barbarians.
Arrows: Your panic button for Minion Hordes and Goblin Barrels.
Fireball: The spell gives you a direct answer to Barbarians and other mid-health troops.
Cannon: The primary static defense, it offers a stable damage dealer.
You might also like
Card Roles & Killer Synergy

Each card in your deck should fulfil a specific job. When they work together, you can counter just about any unit and strategy.
The Tank (Giant): The Giant is your slow-moving battering ram. You almost always play him in the back, behind your King Tower. This gives you time to build elixir and deploy your support crew as he marches towards the opponent’s tower.
The Support Section (Musketeer & Bomber): These two form the core of your push. The Musketeer stays at a safe distance, picking off air and ground units, while the Bomber trots just behind the Giant, clearing the path of any pesky Goblins or Skeletons. A Giant protected by these two is a fearsome sight.
The Bodyguards (Valkyrie & Mini P.E.K.K.A): These are your primary defensive tools that flip into offensive powerhouses. Did your opponent drop a Giant or a Prince? Deploy the Mini P.E.K.K.A to shred it, then drop your Giant in front of the surviving Mini P.E.K.K.A for a deadly counter-push. Is a Skeleton Army swarming your tower? The Valkyrie’s 360-degree spin cleans it up instantly.
The Utility Spells (Fireball & Arrows): Your spells are your get-out-of-jail-free cards. The golden rule of Arena 3 is this: save your Fireball for their Barbarians. Using it on anything else is a risk. Arrows are your low-cost answer to wide swarms that a Bomber might miss, like a surprise Minion Horde.
The Foundation (Cannon): This humble building is your defensive MVP. Placed in the center of your side, it forces enemy troops on a fatal detour, buying your towers and troops precious time to eliminate the threat.
How to Pilot This Deck to Victory
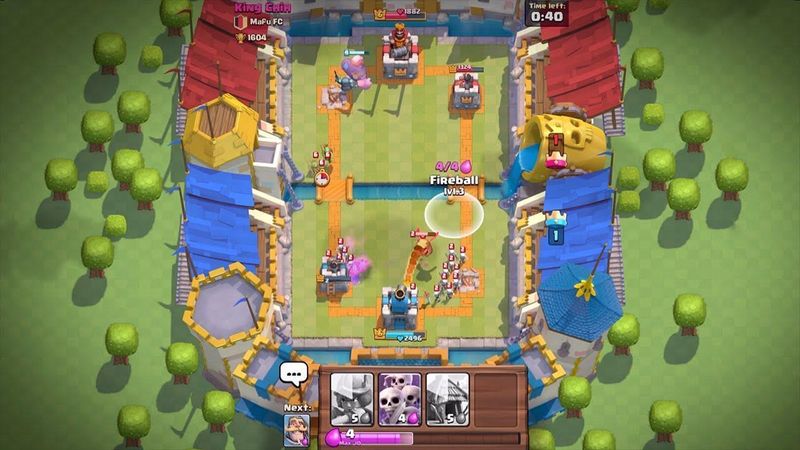
Success with this deck comes down to a simple rhythm: defend, build elixir, and launch an unstoppable counter-attack.
The Opening Move: Wait for your elixir bar to fill. If you have a Giant, Musketeer, or Valkyrie in your starting hand, you can play one from behind your King Tower to start a slow push. Alternatively, you should wait to see what your opponent does and react.
The Defensive Stance: Let your opponent make the first move and use your Cannon to pull their tank. Use Valkyrie or Mini P.E.K.K.A to eliminate their push. Your goal is to defend with as little elixir as possible, creating an elixir advantage.
The Counter-Push: After your Mini P.E.K.K.A has just dispatched an enemy Knight, and it will start walking toward their side. Seize this moment by dropping your Giant at the bridge in front of it. Suddenly, you’ll have a full-health tank leading a high-damage troop. Add a Bomber or Musketeer behind them, and you have a push that can overwhelm an unprepared opponent.
Spell Discipline: Be patient with your Fireball. When you see your opponent drop Barbarians to defend against your Giant, that’s your cue. A well-aimed Fireball will wipe them out and clear the path for your Giant to connect with the tower.
Comparing Our Deck With Alternatives
Although many pros consider our deck the optimal one, you should also consider options. For example, many gamers love deploying Goblig Hut Control on these maps. Here’s how the two lineups stack against each other:
Feature | Giant Beatdown | Goblin Hut Control |
|---|---|---|
Win Condition | Giant | Chip damage from Goblin Hut & counter-pushes |
Playstyle | Build massive, overwhelming pushes | Defend and apply constant, annoying pressure |
Core Supporters | Musketeer, Bomber, Mini P.E.K.K.A | Barbarians, Spear Goblins, Knight |
Defensive Tools | Cannon, Valkyrie, Mini P.E.K.K.A | Tombstone, Barbarians, Valkyrie |
Elixir Management | Requires building elixir for big pushes | Focuses on low-cost cycles and constant card placement |
Learning Curve | Teaches core offensive beatdown principles | Teaches patience and defensive chip strategy |
While both decks are effective, the Giant Beatdown style gives you a more direct path to victory. It puts emphasis on fast and strategic attacks, which are also essential for winning matches in later arenas.
Mastering Key Matchups
Against Prince/Giant: Let them cross the bridge, then place your Cannon in the center to pull them. Drop your Mini P.E.K.K.A or Valkyrie to finish the job.
Against Skeleton Army/Swarms: Your Valkyrie is the perfect answer. The Bomber and Arrows also make short work of these low-HP troops. Never let a swarm surround your Giant without a splash unit to back him up.
Against Baby Dragon: This is the Musketeer’s time to shine. Her long range allows her to target the Baby Dragon safely from under your tower’s protection.
Against Hut Spammers: This can feel like death by a thousand cuts. The key is to build one massive push that they can’t defend. Use your Fireball to hit their tower and their Goblin Hut for excellent value. Your Giant, backed by a Bomber, can steamroll through the waves of Spear Goblins.
Eager to Climb Faster?
Going from one arena to another is the most exciting part of Clash Royale. However, leveling up your cards, mastering new decks, and developing your skills takes skill and patience. For example, even if you know how to play the game, you might struggle to acquire the right decks and currencies.
If you don’t want to spend all this time grinding, you should consider buying a premium Clash Royale account at igitems. These profiles are stacked with the cards and resources you need to compete at the highest level. In a way, it’s like buying stuff through the official store, with the main difference being that you’ll get more value with used accounts.
Your Climb Starts Now
The Barbarian Bowl is one of the more popular arenas in Clash Royale. To defeat the arena, you’ll need to form a viable yet versatile strategy. However, with the right deck, you’ll be able to beat all the units that appear in this zone.
We recommend focusing on smart elixir trades and refining your counter-pushes. Another important thing is taking your time with the spells. Once you master these principles, you’ll have an easy time finishing the level. In fact, you’ll hone your skills to a point where future arenas will pose no problem!